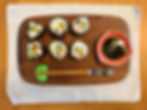
Time for Spring! Beans, Demons, and Lucky Sushi Rolls (ASIAN 258)
- Erin Brightwell
- Feb 3, 2021
- 5 min read

おはよう!Professor Brown has invited me to step in and take you to Japan for a quick tutorial on the food associated with the Japanese holiday of Setsubun 節分 (literally the seasonal divide, but as a holiday, the change from winter to spring). Below, I’ll give you a brief background and then walk you through how to make your own ehōmaki 恵方巻 (lucky direction roll), a traditional dish for Setsubun that is supposed to have originated in Osaka in roughly the 19th century.
Now, as some of you probably already know, Setsubun is celebrated the day before the beginning of spring, usually 2/3, but this year—for the first time in 124 years!—it fell on 2/2. The holiday’s most iconic activity is mamemaki 豆撒き(bean tossing): throwing roasted soybeans at demons as you drive them from your house while yelling, “Oni wa soto! Fuku wa uchi!” (Demons out, good luck in!) You’re also supposed to eat as many beans as you are old, but we’ll skip that part, because in my case, that comes to more roasted soybeans than I feel like consuming. But these beans are a serious business! When I last lived in Japan a few years ago, I went to Shimogamo Shrine for Setsubun, and I was woefully unprepared for the many grannies who had come with bags to try to get the lucky beans tossed at us! (They did check to make sure that I had gotten some beans, too, once the melee was over…)

Setsubun is more than just bean-throwing fun, however. The rites are linked to tsuina 追儺 (demon expulsion), a ritual purificatory practice that was carried out at the Japanese court but began in China, supposedly having arrived in Japan during the time of Emperor Monmu (683-707, r. 697-707). As old as these rites are, however, as I mentioned above, the “lucky roll” we’re making here is a much more recent invention. And despite its Kansai origins, the ehōmaki is now widely available throughout Japan as a Setsubun treat. When I’m outside of Japan, it’s the one thing I feel that I absolutely have to eat to mark the beginning of spring! So now, let me show you how you, too, can make your own lucky roll to get spring started right.
The “lucky roll” should have seven ingredients, symbolizing the seven gods of good luck. According to https://www.thespruceeats.com/good-fortune-sushi-rolls-2031612, these ingredients include, “[f]or example, simmered shiitake mushrooms and kanpyo (dried gourd), cucumber, rolled omelet (tamagoyaki), eels, sakura denbu (sweet fish powder), and seasoned koyadofu (freeze-dried tofu) are used.” For all kinds of reasons (see: Midwest, pandemic, love of avocado), I prefer this version (http://www.cuisinivity.com/recipe/archive/entrees/large_sushi_roll.php), which is also simple enough to make with minimal props. The only thing you really need is a sushi mat.

(And no, I don't usually wear a mask in my kitchen, but it's plum season! Below, a "tasteful" setsubun figurine with plums...)

The recipe is pretty straightforward, so I’ll just focus on providing practical tips here. First, you can easily make the sushi rice (which is the first thing you should get started cooking) in a regular bowl. But if you’re going for fancy (or cheap fancy, in my case), you can use a hangiri. If you go this latter route, you’ll need to season it before you use it the first time. This means soaking it overnight with ¼ c. rice vinegar and water. Click on https://www.allaboutsushiguide.com/hangiri.html for more instructions. You’ll also want to fill it with water—which you’ll dump before putting in the rice—while your rice cooks. 2 cups of uncooked rice will make a little more than the 450 grams the recipe calls for.
Next, prep the vinegar mixture for "sushi rice" while the rice is cooking so that it’s cool by the time your rice is ready. (I use regular Japanese rice, and it works fine.)
Then, I suggest making the shiitake and the spinach. Dried shiitake work fine—they need to be soaked for about 5 minutes in hot water before you slice and braise them. If you think two looks too stingy, don’t be fooled. I thought that, too, and so I made 1 more (I couldn’t have 4 shiitake, after all, since that would be bad luck), and I ended up with too many shiitake.
The spinach should be put into boiling water for just about as long as it took me to take this picture.
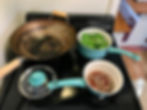
While your spinach and shiitake cool, tackle the omelet. This always stresses me out, but it’s actually not that hard. I do recommend cooking longer on low heat and just letting it cook through rather than attempting to flip it. At least that’s what I do. I’m mentally scarred from when I tried to flip noodles in a wok in Thailand, and half of them ended up on the floor. But if you have better hand-eye coordination, have at it.

By this time, your rice is probably ready, so transfer it to your dish of choice and start sprinkling the vinegar and mixing gently. (Remember to keep a bit of vinegar aside for the carrots.)
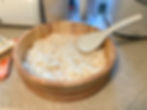
When you’re done “flicking” your rice, just cover it and set it aside. I do not recommend setting it aside for too, long, though! Professor Brown called me in the middle of my roll making, and the rice for the second roll was definitely less well behaved by the time we were done chatting… instead, you should probably set it aside just long enough to slice up the rest of your ingredients.

At last! The rolling. The big thing is to not overload your roll. My nori actually has lines on it, which made rice distribution easy. You don’t want to cover the entire piece, because the nori needs to stick together at the end.

I then add ingredients more or less as my recipe does in order to ensure reasonable distribution.
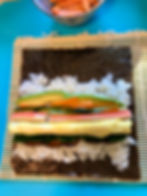
Then you roll it up! You’ll need to roll up the closest edge of your mat while you roll so that you don’t end up with sushi mat inside your dinner. Squeeze your roll gently as you go.

And voilà! Since it’s an ehōmaki, don’t cut it! That would sever your good fortune.
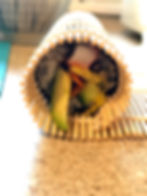
Instead, you should eat it facing in the year’s lucky direction (south by southeast for 2021) and in silence. My trusty assistant, 織田イワシ (ODA Iwashi), carefully monitored this from her perch (on my table!) in precisely the lucky direction. Happy Spring!

PS You can also use this recipe for regular futomaki, as I did below with my leftovers. Be sure you have a sharp knife if you go this route, because sawing at a sushi roll…is not pretty. I suggest you slice the roll in half first and then into smaller pieces. Enjoy!

